Wednesday, March 9, 2016

Mar 09 - Steering pump is mounted

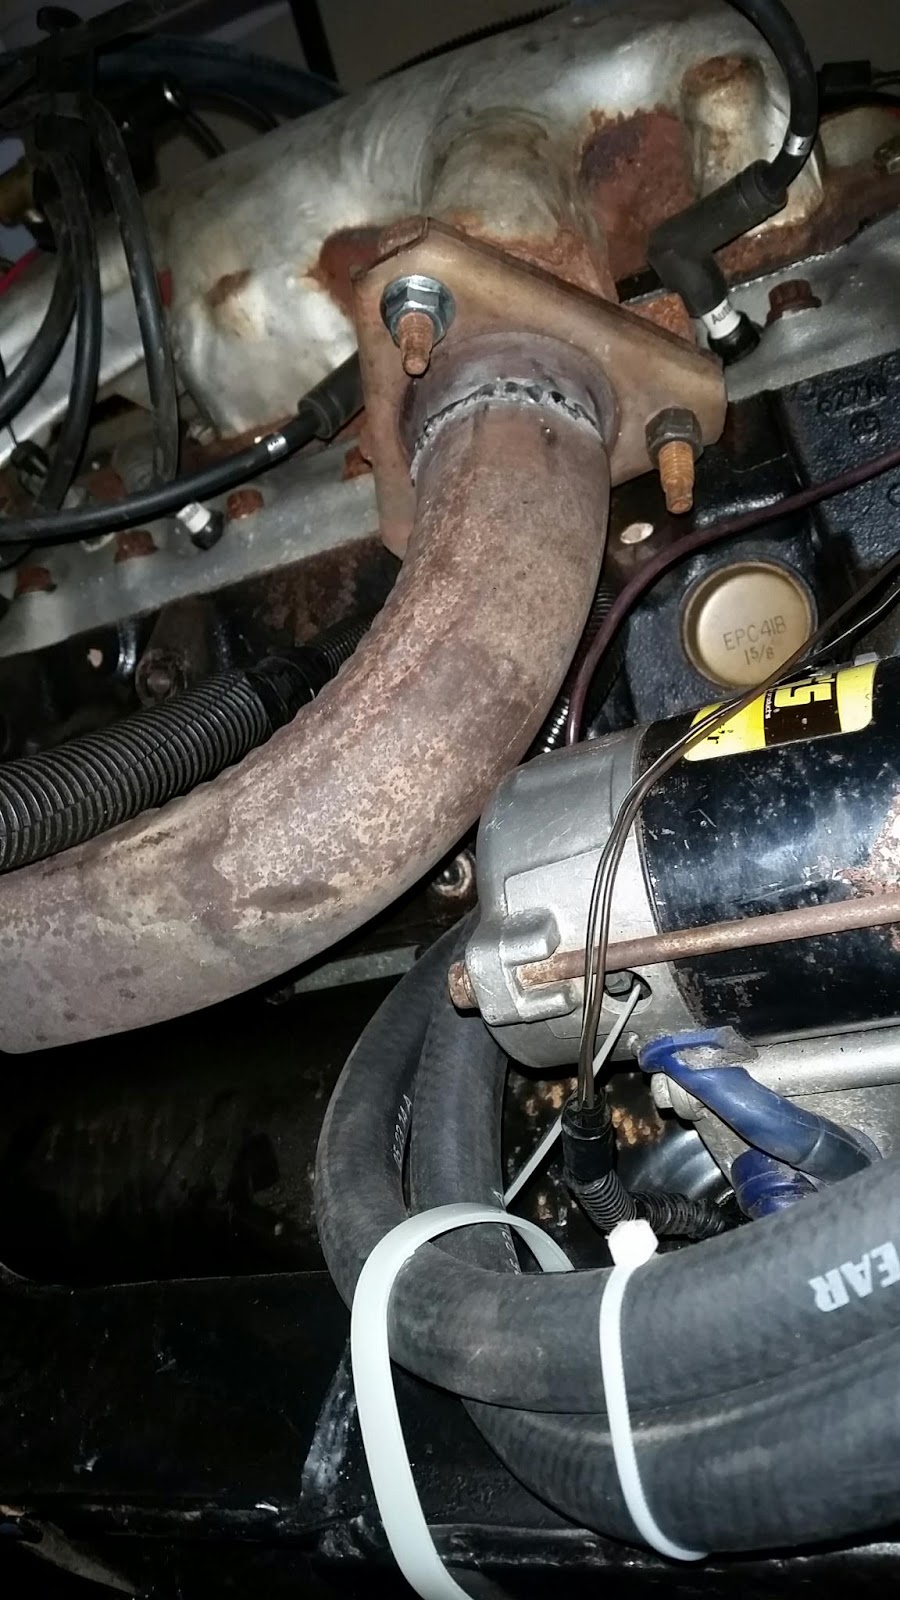
I finally got the steering pump mounted today.  It is very cool.  I think I may have found my steering pump hoses too.  Pulled them out and set them aside.  Will check them out tomorrow.

I know the pump isn't 100% level and all of that.  It'll work, though.  And I have said it here 100 times already I'm sure. . . functional first pretty second.  And yes it'll run just fine at a little tilt.  If anything it helps ensure the pump gets all of the fluid from the reservoir as the tilt helps in setting it at an angle that would make the intake to the pump the lowest point in the reservoir.

Here's a pic.  Yes, I did some welding to make it more of a mount that has bolts all the way through (5" long bolts).  There are 2 each 3/8"-16 bolts in the front and a 1/4"-20 in the rear.  I used 1/2" gas pipe that was removed from my house as the pieces I made the stand from.  It'll get cleaned up and painted before long.  Knock down some of the crap parts of the weld with a grinder and POR that thing.  :-)


I'm so happy this thing is getting done.  Have I said that yet today?  :-D

Tuesday, March 8, 2016

Mar 08 - I'm now capable . . .

to take every wrong turn possible.


So I have my "new" LS1 steering rack in.  I call it that because it is one of those that they started using when the F-body moved from the LT1 to the LS1 motors.  The last one I had was leaking like crazy and I didn't want this to be my starting point.  Dumping stop leak into my "newly" built car...  :-)

So this is really good because now, even if I didn't add in my power steering pump/reservoir/controller, all-in-one (which you can see in the pictures leaning to one side), I'd still be able to steer this thing now.  Makes it easier for moving it around now too.

But I'm more focused on this thing being a driver very soon than I am about pushing it around.  Aside from the obvious Clutch test that will be under way once my hubs come back from up the road. 

Oh YES!!!  I have sent off my hubs today.  I found some guys who will turn them on a lathe and broach them to the Pontiac G6 axles that I am using in this build.  Oh happy days really are just around the corner!!!

They'll be getting my hubs tomorrow (they're that close by).  And I'll have to tell them that I need the outer hub that centers inside your wheels to be turned down a bit too.  5 or 10 thou I'm guessing would be good.  I can't currently get my Murci wheels on the car properly in the back.  I beat them on and off (insert pun here) with a hammer as they're too tight to mount.

Will be nice seeing this thing on the ground with axles in it, clutch, gas pedal, steering.  Hell, I may even have brakes before too much longer.  Jesus, this car really is getting built isn't it? 

Extremely happy to see this all coming together.  It has been a long time coming.  Been waiting about 13 ~ 14 years to build this thing.  I'm glad it is finally happening.

Take care y'all and WATCH OUT!!!, it's a jungle out there!!!  :-)

Thanks,
Coop

Mar 07 - Running around, or getting one . . .

I spent this day between running around and getting the run around.

Not much progress today, but tomorrow . . . the light begins to shine.

And you have to go down those roads that suck to really appreciate the ones that don't.

Sunday, March 6, 2016

Mar 06 - What's this?

I'm already looking at the overall look of the tail of the car and printing out the Lambo script for the trunk lid bottom, right corner.  I didn't want to use the old 80's looking block font that carried over initially to the Diablo.  I like the script font much better.  It will be a pain locating the dots on the "i"'s once the rest of the piece is applied.  this will be after paint of course.  But if you know anything about my builds, I typically mock up what it will be, before it is.  Even when I'm in my build as I go mode, I do a quick mock up just prior to execution.


Still looking forward to firing the fuel injector today.  I think I may make dual blog entries today.  Or just come back and edit this one...


Later that same day;

WOW!! Well.  I guess I shouldn't be surprised.  I mean, if you had a nice spray pattern you might screw up and make some good mileage.  Be closer to fumes.  Of course we couldn't have that from the factory.

Here's my video of firing one of my injectors off of the garden hose so I can see the pattern and better know how to aim it in the vaporizer box.


Last pic of the day.  I did a few more holes in the body to allow screws to hold my tail lights on.  On one side.  They're lining up good enough for who it is for, but the screws themselves aren't the right ones so I'll be away tomorrow to look into sourcing those.


Saturday, March 5, 2016

Mar 05 - Too many diff directions

You know when you start to do one thing but about 4 diversions later you realize you're nowhere near where you were when you set out to get a particular thing done?  Yeah, that was my day, today.
So I set off to make a fuel injector tester and to test a FI that I have from my original set that came stock on my 95TA LT-1.  So I made a 555 circuit as a guy on YouTube had suggested.  Got that altogether pretty quick.  Found a power cord.  Dug up a battery and put it on the Battery Tender Jr.  Was moving along pretty good.  Then it came down to getting the injector to fit onto something that I could use with a garden hose.  After a lil fab work, I had a friction fit with an injector and a 5/8" garden hose mender.  It has a hose barb on both sides and once I got one end to be beveled slightly, I then cleaned up the top of the injector (without the o-ring on top) and was getting it together.


Then it hit me, maybe the battery isn't done on the charger?  On the way to the charger, I spotted something that I thought I could get done right quick.  Then this lead to another thing... I needed to see how the exhaust stuff was going to line up and measure how much pipe I would need to come up with for my monza tips to show up at the right spot on the back of the car.  So I had to get help putting the rear bumper on.

Then I had to have my son shoot a couple of pics for me, so I could see the appearance of the tips in about the right spot.  So I had him shoot pictures of me holding them up one at a time with different depths under the car so I could see where they would be under the car to make sure that would work out for me.


I think the second one works out best.  I think that is more of a stock location too.  It'll be very tight getting the driver side one into that position for the pipe that leads up to that tip.  But I think I can heat and bend some pipe into that spot.

Then of course, while I was checking out stuff on the tail, I had to look at some of the other pieces I had been wondering about for ages.  I went and grabbed the center tail and light bezels to check them out.  Then I seen how the tail lights themselves should mount so I grabbed one set of them.  Next thing you know, I'm drilling holes and mounting tail lights.  I didn't drill the holes for the screws that will hold them on, but I did hold it up to have a look.


So who knows what the future holds?  Maybe tomorrow I'll go ahead and fire that fuel injector.  I did make everything to be able to fire it already.  :-D

Thanks for your time.
Coop

Friday, March 4, 2016

Mar 04 - awww nuts

So I was able to score some nuts for my stock exhaust today. That plus a pipe pull from Hawks and I was in business. I broke out the Dewalt reciprocating saw and went to town. Cut and welded for one side and only had to cut so far for the other.

I also cleaned up my plug wires a bit with some wire keepers.

Some progress beats none.

Get more in the coming days.

Monday, February 8, 2016

Feb 08 - Some intake goodies came in

I didn't get all of the parts I'm waiting on, but felt that it has been entirely too long since my last post and any progress being made.  I have done a couple of little things on the motor.  Clean up some wiring, very little.  Plug wires got routed better.  Started to mock up the intake better with the parts that came in.  Radiator hoses from the water pump are looking pretty good.

My reducing coupler came in.  3.5 inch to 3 inch.  It is used to connect from the air intake elbow to the intercooler (vaporizer).  The piece that is in front of the oval shaped throttle body and makes a 90 degree turn into a 3.5 inch round opening.

So I took some shots of what I've got and will be contacting a guy to do some aluminum welding for me, hopefully this week.  I'll have him work out the fuel injector bung and holder of the fuel rail on the bottom of the intercooler as seen in these pics.  It is being converted into a vaporizer box.

Thanks for your time.


The hole that can be seen on the square end facing the camera, pointing towards the radiator hose is the exit line for the exhaust fumes to be routed up to the EGR controlled port on the intake plenum.  The one that is pointing down out of the bottom of the intercooler (vaporizer) is a mounting point for holding the box.  There is one on the top just like it.  Meant for an M8 bolt.  You can see through to the air passage inside this hole.  I've considered using it to double as a k-type thermo couple mounting location.  Depends on what sizes and lengths I find that I want to use to know the intake air temperature in this spot on the top.  I have to make sure I keep this temp in a workable range while driving in all sorts of conditions.


Another couple of good shots to see the NOS injector port that will be used for hydrogen enrichment in my fumes 2.0 version of this motor.  If you see irondmax (Max Miller) videos on youtube, you can see what kind of improvement this will be to my gas mileage.  Well, when you're running on more water than you are gasoline, of course your mileage goes up!  :-)

But this should go up about 4 times that of what I can get on just straight gasoline fumes only.  So I should have a variable 200 ~ 800 mpg rating on the highway when just cruising.  Gonna be nice.  About time.  Been over 100 years in the making.