I'm getting it done. :-)
I've finally got my front suspension all torqued down. Yes. The videos you've seen of me driving it around before now had some bolts with nuts and some were just bolts. :-) Like the top of the shock was just pinned (and yes there is a ton of friction there) and I wasn't doing any highway driving so I wasn't worried about it. The few passes I have videos of are about all of the ones I've ever done. I think I only have one drive without it being video'd.
But I'm so glad that this is finally done. Was a real bear trying to find all the right metric hardware to put my stuff together with. 3 out of 4 (as it turns out) of my bottom A-arm bolts are M12x1.75x90mm long. One of them was a 1/2-13x4! Whatever. It's all smooth and as it should be now. I have some extra 1/2-13x4 bolts and nylon lock nuts lying about now. I guess I'll take them back tot eh store and get my money back. Don't think I'll be needing them in the rest of the build.
But the big deal (drum roll please) is that I can now get an alignment. YAY! :-) I've been looking forward to that day for some time now. My crap toe job and non-center steering wheel days are about to be over (until it needs another alignment). hee hee
I've got a guy I've used for my regular cars, he does a bang up job and has a nice laser setup. I'll be talking to them first about the settings. I have the Diablo manual that has been floating around out here forever and will see what he thinks about mostly following that. I don't know that every number will be the same or not. As these things (even though mine is coil over) are not the same as factory. Plus it has to look right in the wheel arch. :-) I noticed when screwing around with my caster and camber that it can move the wheel to the point that it interferes with the body.
Sunday, April 2, 2017

Saturday, March 25, 2017
Mar 25 - more on the doors pt 2
In continuing to document my progress on building out my doors, I have the following update. I've not made any more progress on the passenger side, but have moved to the drivers side. I had help with me on Friday that could help with getting the latch going. Once I did that I just kept on going with what I already knew from the passenger side on how to get started on the window and regulator on the driver's side. So once I was over there on the driver's side, I decided to take that regulator to the next step that I had yet to do on the pass side. I cut the vertical track out of the fiberglass mount and made a new one directly onto my Lambo door. I was able to get much closer to the tolerance of what room I have to work within and was able to make the regulator removable.
Here are some pics of the work that was done Friday afternoon and Saturday.
Here are some pics of the work that was done Friday afternoon and Saturday.
 |
| Was able to make one cut for the striker to come through. Drilled either end and hit the two lines with the vibration cutter. |
 |
| Got these two holes on the money for the striker. |
 |
| Striker is on. |
 |
| Latch is on. This stuff goes so much faster once you've done it before. ;-) |
 |
| Rivet time. Keeps everything in place while I work other things out. |
 |
| Door lines up pretty nice. |
 |
| Cut away some steel to let the vertical get some clearance. All of this with the glass is very close. Can also see where I welded my small piece back to the horizontal bit. |
 |
| Made a small angle bracket for the lower to bolt to. Bent it as well. |
 |
| Both doors turned out the same on the angle of the bottom of the glass to the horizontal rail. I think I'll work with that. |
 |
| On to trying to mount the glass to the rail next! |
Thanks for your time and hopefully these tips will help someone else.
-Coop
-Coop
Sunday, March 19, 2017
Mar 18 - More on the doors
This update follows on from the previous one about how to get the doors done.
In the previous episode I was talking about getting the latch in, then hanging the window + regulator then moving on the strut that holds the door open.
This one I'm talking about the window and the regulator. I'm also discussing the door skin being removable but only cutting it, not the later steps about how to add it back.


In the previous episode I was talking about getting the latch in, then hanging the window + regulator then moving on the strut that holds the door open.
This one I'm talking about the window and the regulator. I'm also discussing the door skin being removable but only cutting it, not the later steps about how to add it back.
 |
| Using a variable speed saw I'm using this cutter that has a 1 3/8th wide end on it. It was very nice for plunging into some interesting shapes to get the cut right. |
 |
| I was keeping the tool at about a 45 degree angle as I was cutting the front and back areas of the door. |
 |
| I was showing how you can also just use the corner of this tool to make nice radius cuts. |

 |
| This was one of the rivets that I had placed around the whole of the skin. This will make it easier to relocate the lower skin back to where it was when it was all lined up. |
 |
| Lower skin removed. |
 |
| In these images you can see how wavy the edge of the glass is. Not a very good manufacturing process. |
 |
| Further down the length you can see it isn't straight at all. Does this along the whole of the top from front to back edges. Roller coaster. |
 |
| You can see that I have drilled and some rivets in to hold this piece up in place, along the front edge you can see more drill hole locations. The D&R came template'd with them into the body. |
 |
| Looking back the other way. |
 |
| Regulator sitting in near the right location. Glass being held up with tape so everything can be checked out. |
 |
| Getting dark but was trying to provide another angle for zooming in and looking at it. |
 |
| Both of these images need zoomed in to see more and rotated. |

Here's a youtube video going over what has been done. More details there than what I have typed.
Sunday, March 12, 2017
Mar 12 - got a visit and almost a ride
Adrian came by for a visit today.
We got out the driveway a good bit too. Even was pulling up the hill. But then the heat was too high and it went POP! Of course then I went and screwed with too many variables and we didn't get to drive out my road and back. I will be making more progress on the fuel control now though.
I ultimately switched off the malfunctioning Teensy Arduino that controls my fuel and went back to the stock ECU that came with the motor. I will be figuring out a way to switch how many injectors worth of firing that I'm allowing my one injector to listen to. I'm thinking I'll run 3 more NPN transistors and control them with my heat control Teensy (Arduino). This will let me fire my one injector at the exact same rate and amount if it were the original 8 firing (for cold starts)... and I could also shut off the grounds that are trying to fire my injector (begin to ignore them) as I want to lean out more as the car comes up to temp. Now that sounds like a plan!
Stay tuned we'll see how that goes. Anyhow, without any further a due here's the show.
Oh and it's a show alright! :-D I had no idea what was going to happen next. I was getting pretty excited too!
We got out the driveway a good bit too. Even was pulling up the hill. But then the heat was too high and it went POP! Of course then I went and screwed with too many variables and we didn't get to drive out my road and back. I will be making more progress on the fuel control now though.
I ultimately switched off the malfunctioning Teensy Arduino that controls my fuel and went back to the stock ECU that came with the motor. I will be figuring out a way to switch how many injectors worth of firing that I'm allowing my one injector to listen to. I'm thinking I'll run 3 more NPN transistors and control them with my heat control Teensy (Arduino). This will let me fire my one injector at the exact same rate and amount if it were the original 8 firing (for cold starts)... and I could also shut off the grounds that are trying to fire my injector (begin to ignore them) as I want to lean out more as the car comes up to temp. Now that sounds like a plan!
Stay tuned we'll see how that goes. Anyhow, without any further a due here's the show.
Oh and it's a show alright! :-D I had no idea what was going to happen next. I was getting pretty excited too!
Saturday, March 11, 2017
Mar 10 - Diablo door latch
I now have my passenger door latch installed. I made a lengthy video explaining the latch install and the plan for how to assemble the rest of the components inside the door.


I forgot that I had a couple of stills for helping to see it before the latch itself was installed. This Laser thing worked out really well because I was able to get a single cut done and it fit perfectly without messing about trying to figure out the angle of the line to cut in the door.


Wednesday, March 8, 2017
Mar 8 - Marker lights are done
I've got some pics here of the finished product. I don't have any close ups but I did measure each one to make them parallel to the body lines instead of level with the ground. The two (lines) were fairly close together but off from one another. So I figured people would say it was crooked just because it didn't go along with the body line, so I went with the body line.
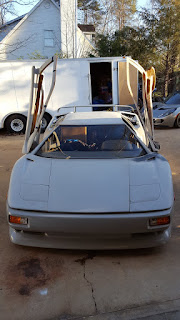


.
.
.
Got a funny here. I posted this up to my buddies. I told them that I have a washer and dryer to sell. hee hee :-D

Thanks,
Coop
Coop
Tuesday, March 7, 2017
Mar 7 - Them marker lights tho
I've come up with a pretty quick way to make the holes for the markers lights that are seen on the sides of the car. I used a hole saw that was the right size to match the clearance needed for my Hyundai marker lights. I drilled two holes that over lap. Then I trimmed the peaks down with a vibrating saw. I then finished off the clean up with a dremel tool that has a deburring tool attached to it.


On the rear I couldn't really put mine on the rear bumper as I should have done. It doesn't work out that way on this kit to fit those markers into that space (depth wise). Plus I wouldn't have a way to get in behind of them to work on them easily. but yeah, the depth doesn't work out any way so it's a moot point. What I did do was use a torpedo level to mark a level line right above the joint where the bumper meets the quarter panel. I measured across the width that I had and it came out to 9". So I centered the marker light on that space and kept its centerline to where the marker would be low and near the joint.

I marked the overall width I needed to fit the backing of the marker inside the hole. I centered that and marked both edges. Then when I lined up the drill with the hole saw on it, I could see if I was going to be far enough off of center to make the outside edge of the cutting circle come to the outer most edge of what I needed. I started the pilot drill bit into the body and let the hole saw cut about a 1/16th of an inch deep into the body then I backed it out and started the other hole that was beside of it and overlapping the one I already started. It really doesn't matter which one you finish first once you've got them both marked deep enough to keep the bit from wanting to wander.

On the front I measured down 2.5" from the top of the bumper and made some marks to cover the width of the marker. I then used my width of the marker (5") to make sure I left 1" to the edge near the front tire and measure back towards the front to mark the center for this marker. I also made marks like in the rear where I knew how wide my overall hole had to be to fit the back of the marker in it. It was 2.25" for this overall space. So I made a center of 1 1/8th" and marked the outside edges with the end of the tape and the 2.25" mark respectively. Then again I would eyeball the outside edge of the hole saw to that edge and kept on the center line to drill my hole and mark each before finally cutting all the way through.
I know that sounds like a lot to describe, but once you get it (what I mean) it goes very quickly. I bet I didn't spend 15~20 mins a pair front, or rear. I probably didn't have an hour in it and was done with all 4 holes. Trimmed out too. Ok, 2 hours out in the garage but not counting my screwing around and coming up with this method before I actually did any work. :-)
I'll post again tomorrow when I finish up by drilling the last 2 holes per marker where the screws mount the marker to the car. I've not done that tonight as I don't have much room to work on the car in the garage and I'm really cramped for space on the drivers side now. So I'll pull the car out and do it in the driveway and push it back in after I'm done. I'll get the nose mounted again as well. I need to start tightening the nose to the body so it'll retake its shape back. It's in pretty sad shape right now. Will take a little tightening up once a day I suspect until it fits like it used to again.
Thanks for your time.
Coop


On the rear I couldn't really put mine on the rear bumper as I should have done. It doesn't work out that way on this kit to fit those markers into that space (depth wise). Plus I wouldn't have a way to get in behind of them to work on them easily. but yeah, the depth doesn't work out any way so it's a moot point. What I did do was use a torpedo level to mark a level line right above the joint where the bumper meets the quarter panel. I measured across the width that I had and it came out to 9". So I centered the marker light on that space and kept its centerline to where the marker would be low and near the joint.

I marked the overall width I needed to fit the backing of the marker inside the hole. I centered that and marked both edges. Then when I lined up the drill with the hole saw on it, I could see if I was going to be far enough off of center to make the outside edge of the cutting circle come to the outer most edge of what I needed. I started the pilot drill bit into the body and let the hole saw cut about a 1/16th of an inch deep into the body then I backed it out and started the other hole that was beside of it and overlapping the one I already started. It really doesn't matter which one you finish first once you've got them both marked deep enough to keep the bit from wanting to wander.

On the front I measured down 2.5" from the top of the bumper and made some marks to cover the width of the marker. I then used my width of the marker (5") to make sure I left 1" to the edge near the front tire and measure back towards the front to mark the center for this marker. I also made marks like in the rear where I knew how wide my overall hole had to be to fit the back of the marker in it. It was 2.25" for this overall space. So I made a center of 1 1/8th" and marked the outside edges with the end of the tape and the 2.25" mark respectively. Then again I would eyeball the outside edge of the hole saw to that edge and kept on the center line to drill my hole and mark each before finally cutting all the way through.
 |
| Yeah, this one came out crooked. It still gets covered by the marker, so it's all good. :-) |
I know that sounds like a lot to describe, but once you get it (what I mean) it goes very quickly. I bet I didn't spend 15~20 mins a pair front, or rear. I probably didn't have an hour in it and was done with all 4 holes. Trimmed out too. Ok, 2 hours out in the garage but not counting my screwing around and coming up with this method before I actually did any work. :-)
I'll post again tomorrow when I finish up by drilling the last 2 holes per marker where the screws mount the marker to the car. I've not done that tonight as I don't have much room to work on the car in the garage and I'm really cramped for space on the drivers side now. So I'll pull the car out and do it in the driveway and push it back in after I'm done. I'll get the nose mounted again as well. I need to start tightening the nose to the body so it'll retake its shape back. It's in pretty sad shape right now. Will take a little tightening up once a day I suspect until it fits like it used to again.
Thanks for your time.
Coop
Subscribe to:
Posts (Atom)