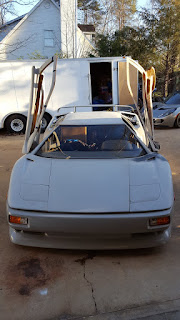
I've come up with a pretty quick way to make the holes for the markers lights that are seen on the sides of the car. I used a hole saw that was the right size to match the clearance needed for my Hyundai marker lights. I drilled two holes that over lap. Then I trimmed the peaks down with a vibrating saw. I then finished off the clean up with a dremel tool that has a deburring tool attached to it.


On the rear I couldn't really put mine on the rear bumper as I should have done. It doesn't work out that way on this kit to fit those markers into that space (depth wise). Plus I wouldn't have a way to get in behind of them to work on them easily. but yeah, the depth doesn't work out any way so it's a moot point. What I did do was use a torpedo level to mark a level line right above the joint where the bumper meets the quarter panel. I measured across the width that I had and it came out to 9". So I centered the marker light on that space and kept its centerline to where the marker would be low and near the joint.

I marked the overall width I needed to fit the backing of the marker inside the hole. I centered that and marked both edges. Then when I lined up the drill with the hole saw on it, I could see if I was going to be far enough off of center to make the outside edge of the cutting circle come to the outer most edge of what I needed. I started the pilot drill bit into the body and let the hole saw cut about a 1/16th of an inch deep into the body then I backed it out and started the other hole that was beside of it and overlapping the one I already started. It really doesn't matter which one you finish first once you've got them both marked deep enough to keep the bit from wanting to wander.

On the front I measured down 2.5" from the top of the bumper and made some marks to cover the width of the marker. I then used my width of the marker (5") to make sure I left 1" to the edge near the front tire and measure back towards the front to mark the center for this marker. I also made marks like in the rear where I knew how wide my overall hole had to be to fit the back of the marker in it. It was 2.25" for this overall space. So I made a center of 1 1/8th" and marked the outside edges with the end of the tape and the 2.25" mark respectively. Then again I would eyeball the outside edge of the hole saw to that edge and kept on the center line to drill my hole and mark each before finally cutting all the way through.
 |
| Yeah, this one came out crooked. It still gets covered by the marker, so it's all good. :-) |
I know that sounds like a lot to describe, but once you get it (what I mean) it goes very quickly. I bet I didn't spend 15~20 mins a pair front, or rear. I probably didn't have an hour in it and was done with all 4 holes. Trimmed out too. Ok, 2 hours out in the garage but not counting my screwing around and coming up with this method before I actually did any work. :-)
I'll post again tomorrow when I finish up by drilling the last 2 holes per marker where the screws mount the marker to the car. I've not done that tonight as I don't have much room to work on the car in the garage and I'm really cramped for space on the drivers side now. So I'll pull the car out and do it in the driveway and push it back in after I'm done. I'll get the nose mounted again as well. I need to start tightening the nose to the body so it'll retake its shape back. It's in pretty sad shape right now. Will take a little tightening up once a day I suspect until it fits like it used to again.
Thanks for your time.
Coop


