Thursday, March 31, 2016

Mar 31 - Booo, bad cap

So I tried to get my new air compressor up and operational.  I made a cable to power it from my generator.  Plugged it all in and fired up the generator.  Gave it a lil bit to warm and turned on the compressor.  It pulled my genny down to where it was struggling to keep up.  Sounds like a lot of amps were being pulled from the AC motor on the compressor.  While I was looking back and forth between the two to try and decide what I was going to do about it, the compressor's start cap on the motor popped... about the same time I was switching the power off on the compressor switch.

So reading up on this topic, I've decided two things, one being an inductive load I'll probably need a larger generator than one that says it can handle the load from a watt rating standpoint.  And two I may make a cord to run it off of the dryer plug in my wall at the house for a test prior to trying the generator again.  But I suspect I may burn another cap in the testing and trying to get back to being generator powered.

It also sounds like I need to check the centrifugal switch on the motor.  It may be why the cap stayed in effect for too long which also causes the generator and AC motor to fight with one another.

Here's pics of my blown cap.


Blew the lid off of it!  :-D

Wednesday, March 30, 2016

Mar 30 - doors-windows starting

First pic of starting on the door work.  Had a guy come by for a visit today who has built a ton of these things.  Had him give me some pointers about how to go about figuring out the doors.  One conversation helped out so much.  It'll go much faster now.  The work on those.

The donor hardware is from my old 95TA.  Regulators, window motors, etc.  Latches will be from my original kit as will be the gas springs.  Those things (the springs) must be 16 years old by now and still operate like nobodies business.  Made by Camloc out of the UK.

Anyhow, here's my first entry out of more to come on the doors.


Thanks,
Coop

Saturday, March 26, 2016

Mar 25 - Motor sounds good, sounds REAL good

Everyone who has seen this video has commented on how good the motor sounds.  I agree.  It came out much better than I thought it would.  Was a total luck deal there.  I didn't do anything specific to try and make it sound that good.  It's just how it come out.  And I'm pleasantly surprised.

The audio is not good for my voice, you have to turn it up all the way to hear me at all.  And then you can only hear me in the beginning.  But yeah, the car sounds amazing!  For those who love a healthy sounding V8 you will not be disappointed.

Thanks for your time.

Coop


Mar 26 - I got a brake

So I got the fluid in (with some help) and bled out the calipers on all four corners.  Got a good pedal now.  Hope it doesn't leak.  I may have to break loose some of the fittings and clean them up, and tighten them up again.  I had a couple of leaks and although they weren't leaking last time I checked, I'll be keeping an eye on them.

I didn't make any new photos of that as it would just be fluid in the reservoir and the same lines we've seen already.  But wanted to post that, that was done now. 

Will get on to other small things that need to be done, or maybe some wiring tomorrow.  We'll see what tomorrow's update has in store once I can publish it.

Thanks for your time.

Coop

Friday, March 25, 2016

Thursday, March 24, 2016

Mar 23 - cleaning up motor a bit

I started going through some of the stuff on the motor and trying to clean up some connections, vacuum lines, hose routing.  I also began the heater hoses getting plumbed and coolant lines routing.  I need my vaporizer box back to be able to see where all of that will land.  Trying to get a lot of stuff into a small space.

In this pic you can see some of the hose routing.  Little things too like on the front of the water pump that sensor wire loom is tied off against the holes where the factory cable stays were.


You can actually see the top of the intake plenum again!!!  Vacuum hoses and wires are better groomed than they were before.  Computer is tied off approximately where I will make a bracket to hold it out of the way.

You can see the EGR pipe no longer connects to the exhaust manifold.  I've got that capped off on the exhaust manifold and will be using the EGR pipe to pull in the gases from the vaporizer box.  The green wire you can see hopping out of the harness is for the 1 wire connection on my alternator to factory harness.

My son installed my EGR valve for me.  It's in the foreground.

I'm starting to tie back the harness where I can to keep it out of the way of other stuff while I figure out where everything will go.  You may also see in the top left area of the firewall I have made a thing that I, 3D printed to fit onto the old engine lid bracket.  I made it have 3 blocks that have holes in them to allow me to tie off hardness, hoses, etc. to keep them out of the way.

If someone would like the object file, let me know and I will fix it so it will work straight off of the printer.  Mine was a lil too small on the bolt holes and I was little off when I made it, so I used a drill on it to make it fit.  I need to put a couple of nuts on it to secure it.

Monday, March 21, 2016

Mar 21 - Exhaust, axles and then some

So today was a great day.  A Miracle Monday some may say.  :-)

I got the exhaust finished up.  Well, as done as I'm going to do it for now.  I know I will always tinker with this car down the road.  Little weekend projects here and there to upgrade this or that.  Fix it up better than initial.  I'm always doing that sort of thing.  So I'm foregoing the perfectionist thing that I have done in the past to get this thing on the road.  Then once it's good to go (road worthy) then I can always come back and do some things that I thought about on the build but wanted that speed to market instead.  :-)

As I was saying the exhaust is in.  Welded up.  There are a couple of clamps, but mostly to make removing the tips easier/quicker.  I also didn't make the exits perfect.  They're close enough for who they're for.  I seen that also as a good day waster for every little tweak to even them out with each other 100%.  So I gave up on that so I could move on to the axles.  Here's some pics of the exhaust work.


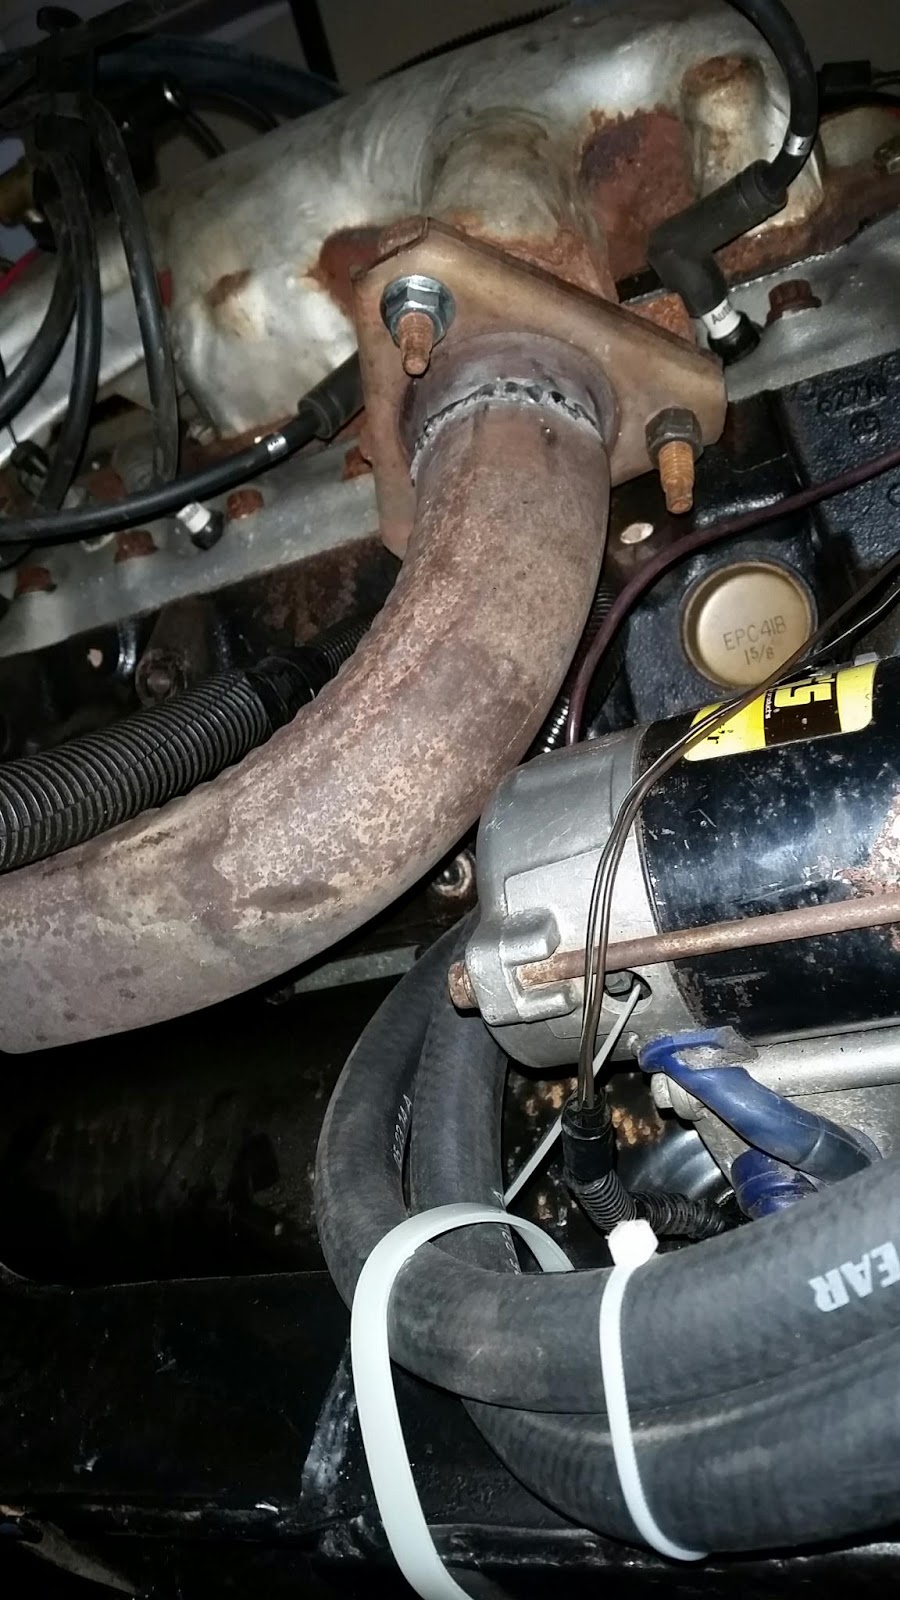
Front bank of LT-1 coming down to go out the normal Fiero spot on the cradle.  The LT-1 came with 2.25" exhaust from the factory.

Rear bank.  Can see the intermediate shaft at the top of the pic.  It sort of wraps around and come underneath the shaft.  Using parts of the stock exhaust welded up to some pipe kit I bought off of Summit Racing.

It's heading in the right direction.

Better shot of the piece that crosses the rear while it was still on the table.  My funky 180 with some distance added into the apex of it.  This funky angle also worked out well to bring me back to level.


I think I need a new brush.  This one looks a bit worn out.

Then once we got the exhaust on, I had to get a shot of that prior to the axles going in.
I've seen it up in the air for so long on those jack stands I forgot how low this thing is at ride height.  Holy crap it's low!

Pulled the body off so I can make it an easier job to put the rear suspension back on with the axles in it.  I had to but the rear suspension back together too as I had it apart to pull the hubs out and send them off to be broached.

I didn't get any shots of us working on the brakes/hubs/etc getting all reassembled.  But I did shoot it once we got it back on the ground.

I am so very proud of this work.

I'm very thankful for all the support my family has given me and the help I have received in making this happen.  It has been an awesome experience.

All those other makers out there.  Keep at it.  You can make it happen.

Determination.  It'll get you places.  :-)

Take care y'all.  And be careful... it's a jungle out there!  :-)

All I'm lacking now is fuel, coolant and brakes and it'll be a drivable chassis.

Sunday, March 20, 2016

Mar 20 - got hosed, honey dew list

I got the shaft on getting the work done today.  That damned honey-do list came up and I didn't get to the car at all.  It was pretty chilly out there today and will be again tomorrow.  I'll get to it more tomorrow though.  I'm looking wide open on the calendar for meetings, so that's a good sign that more work can get done.  I should be able to finish up the exhaust work and then pull the (exhaust) tips off so I can pull the body off of the car after that.

Saturday, March 19, 2016

Mar 19 - blow it out your

Ass.  Got a good chunk of the exhaust done today. May be shut in tomorrow so May have to move on to something else for tomorrow's work.

Friday, March 18, 2016

Mar 18 - cruise in

If nothing else happens today, my day was just made. I've been looking for my cruise control Master for a very long time now. I came across it while hunting something else, isn't that typical? I just did a quick look for the 10 Way connector that plugs into it and don't see it on my harness but that won't slow me down.

Now if I can get my water pump installed today that would be quite a bit of progress actually. I still need the bolts for the water pump.

Pump is in. Torqued. Sensors connected. I cut the shock tower to allow the air intake temperature sensor to get mounted. It's in and connected.

Thursday, March 17, 2016

Mar 17 - Final-frikkin-ly. . . assembled AXLES!!!

So the day has come.  I finally have my axles assembled.  I have hubs that will take those axles and now I'm on to putting them into the car.  But this has been such a long road to just acquire the axles and a full assembly to turn the rear wheels, that I want to take a pause and reflect on it all.

Ok.  That shit is over.  I'm ready to get this thing done!  :-)

So much so, that I'm currently overlooking a situation that I'm not happy about with my hubs getting cut to accept my axles.  The guys cut the splined area down within the hub to make clearance for the non-splined space.  I guess.  I haven't talked to them about it, but I basically got cheated out of almost a full half inch of splined space that should have been engaged with one another.  This would mean buying new hubs all over again and sending them to the same guys (only ones I've found with the broaching bar for the 30 spline G6 axle). 

But I haven't had a chance to call them yet since the discovery, so maybe they have a legit reason.  But looking back and forth between the two parts it looks pretty obvious.  Someone measured wrong and cut it too deep on the lathe.  No one offered up the screw up prior to shipping it back to me.  So we'll see what thy have to say for themselves soon enough.

So without further ado, the requisite pics.


I was also able to hook up some 1157 fixtures to my lenses and check them out.  They're so bright it was killing my aperture compared to my flash.  I had picked up 1156 fixtures but they wouldn't fit.  So I'm putting 1157 ones in and not lighing up the tail light portion of the bulb for the amber blinkers.


Thanks for your time.  Hope some of the info in these pages helps others on similar quests.

Take care,
Coop

Sunday, March 13, 2016

Mar 13 - more of the little things

Today I cleaned up some sanding spots. Chased down a couple of wires on the steering column. Found some EGR parts and got those ready to go on. Cleaned up all the sanding dust off of everything. Found an old tail light wiring harness, I think it was from my 95 TA.  Still hunting the original power wire for the battery hook up in the old Fiero harness. I have the manual for that so I'm about to look that up.

I'm sure I'll update this post with more once I find where the battery goes because I should have a switched power available in the car now.

Success!  I can turn the key and run the starter now!

So on my next test fire, it'll be with the key and accelerator pedal!  Nice one!  Totally hip to that. B-)

Also adjusted the shifter linkage a bit.  I can now get a more positive throw forward into the odd gears, the even gears have always moved into spot plenty well.
 
Thanks,
Coop

Mar 12 - Plug it in

I got some wires on the steering wheel connected to the factory Fiero wiring harness.  Using the same pinouts over the years helped a lot.  I was able to plug in the harness that has the blinkers, hazards, switched power, high beam/dimmer switch and maybe the cruise control.  I still have to find out if the cruise was indeed a part of that connection or not.  Difficult finding some of these connectors in the manuals and looking up the pinouts.

But today (Mar 13) will continue that work with figuring out what I have and don't have so when something doesn't work I just assume it is already connected.  I haven't found the C217 harness connector where I can get my stereo controls from my wheel.  That one is elusive.  It was only on the Pontiac and I have that but not finding the actual connector yet.  I think it is a part of another connector is why I'm having such a hard time with it. 

It claims to have a yellow wire in it, so you'd think it would be easy to find.  I think I'm just going to take my multimeter to it and find it that way.  Can't go wrong there.  If it says it should be X ohms when connected, that's pretty straight forward.  Keep hitting the button and doing the color combos it says on the existing connector that hasn't found a home yet, and I'll be good.

Friday, March 11, 2016

Mar 11 - Those Intakes! ! !

One of the most focused upon aspects of the Lamborghini line is the intakes for the radiators.  I didn't have an up close 'before' pic of the passenger side, but I do have what it looks like now.  I did show the Driver's side before and after though.  I like the passenger side more, it is better finished I think.  I believe I will go back and better finish the driver's side yet.

But hey, like the real Italian car, those are hand made and not every one of theirs are perfectly symmetrical.  (prior to Audi ownership anyway)

So aside from some dinking around today, this was the major thing that got done.  I have half heartedly have always dreaded doing this step.  At some point, I quit worrying about possibly screwing it up and figured I could always fix it if it turned out like crap.  So from that point on I was always looking forward to doing it, just wasn't the time to do it yet.  But now I'm about to pull the body off and mount my ducts for the radiators and the radiators themselves, so it is time to do this step.  After this setup I'll lose the opportunity to get into places on here that will be covered up from now on once mounted.

So without further ado, here are the pics.

Passenger side I did first.  Inspirational work always flows well if I can do it when I'm wanting to do it instead of when I have to do it.


Next 3 are the driver's side 'before' pic.


Next 3 are the driver's side 'after' pics.


The dinking around today was two things, one was replacing the bottom bolt on my tail light bezel.  Old one wasn't long enough to protrude through the body so I could make it an easy bolt on part.  The other was getting my sterrng wheel electrics connected to the Fiero harness.  So supposedly I have a working key switch now for power and cruise control, etc should be there too.  I'll find out more about it over the weekend as I begin to break down the colors on the wires and see what's up.

So stoked this thing is happening!!!   :-D

Take it easy y'all.
Coop


Thursday, March 10, 2016

Mar 10 - Steering pump has lines and fluid in it

So this will be a quick one as there isn't much more to say.  I have cleaned up the lines that went to my old LT1 steering rack, and thank goodness the LS1 steering rack uses the same lines so it has the same fittings on it.  They're different sized fittings on the rack side for supply and return, so you can't get them wrong.  That's cool.

So I have them connected up and tightened to that German torque spec, you know, guten tite.  :-D  Then I added the fluid and had my son keep turning the wheel lock to lock to burp the air out of it.  Looking good so far.  Looking forward to applying some power to it and seeing if it has any leaks under pressure.  So far no leaking with no more pressure than the wheel input is generating.  So stoked!

About to start some electrical work I suppose.  There are the beginnings of the need there.  ;-)


Tie wrap flags were left on for the pic so you can see where I needed to tidy the hoses up.  Didn't cut the pressure line at all, went right together.  Return line was cut to shorten it up some.  Still using the original hose clamp on the end that connects to the reservoir too.

Wednesday, March 9, 2016

Mar 09 - Steering pump is mounted

I finally got the steering pump mounted today.  It is very cool.  I think I may have found my steering pump hoses too.  Pulled them out and set them aside.  Will check them out tomorrow.

I know the pump isn't 100% level and all of that.  It'll work, though.  And I have said it here 100 times already I'm sure. . . functional first pretty second.  And yes it'll run just fine at a little tilt.  If anything it helps ensure the pump gets all of the fluid from the reservoir as the tilt helps in setting it at an angle that would make the intake to the pump the lowest point in the reservoir.

Here's a pic.  Yes, I did some welding to make it more of a mount that has bolts all the way through (5" long bolts).  There are 2 each 3/8"-16 bolts in the front and a 1/4"-20 in the rear.  I used 1/2" gas pipe that was removed from my house as the pieces I made the stand from.  It'll get cleaned up and painted before long.  Knock down some of the crap parts of the weld with a grinder and POR that thing.  :-)


I'm so happy this thing is getting done.  Have I said that yet today?  :-D

Tuesday, March 8, 2016

Mar 08 - I'm now capable . . .

to take every wrong turn possible.


So I have my "new" LS1 steering rack in.  I call it that because it is one of those that they started using when the F-body moved from the LT1 to the LS1 motors.  The last one I had was leaking like crazy and I didn't want this to be my starting point.  Dumping stop leak into my "newly" built car...  :-)

So this is really good because now, even if I didn't add in my power steering pump/reservoir/controller, all-in-one (which you can see in the pictures leaning to one side), I'd still be able to steer this thing now.  Makes it easier for moving it around now too.

But I'm more focused on this thing being a driver very soon than I am about pushing it around.  Aside from the obvious Clutch test that will be under way once my hubs come back from up the road. 

Oh YES!!!  I have sent off my hubs today.  I found some guys who will turn them on a lathe and broach them to the Pontiac G6 axles that I am using in this build.  Oh happy days really are just around the corner!!!

They'll be getting my hubs tomorrow (they're that close by).  And I'll have to tell them that I need the outer hub that centers inside your wheels to be turned down a bit too.  5 or 10 thou I'm guessing would be good.  I can't currently get my Murci wheels on the car properly in the back.  I beat them on and off (insert pun here) with a hammer as they're too tight to mount.

Will be nice seeing this thing on the ground with axles in it, clutch, gas pedal, steering.  Hell, I may even have brakes before too much longer.  Jesus, this car really is getting built isn't it? 

Extremely happy to see this all coming together.  It has been a long time coming.  Been waiting about 13 ~ 14 years to build this thing.  I'm glad it is finally happening.

Take care y'all and WATCH OUT!!!, it's a jungle out there!!!  :-)

Thanks,
Coop

Mar 07 - Running around, or getting one . . .

I spent this day between running around and getting the run around.

Not much progress today, but tomorrow . . . the light begins to shine.

And you have to go down those roads that suck to really appreciate the ones that don't.

Sunday, March 6, 2016

Mar 06 - What's this?

I'm already looking at the overall look of the tail of the car and printing out the Lambo script for the trunk lid bottom, right corner.  I didn't want to use the old 80's looking block font that carried over initially to the Diablo.  I like the script font much better.  It will be a pain locating the dots on the "i"'s once the rest of the piece is applied.  this will be after paint of course.  But if you know anything about my builds, I typically mock up what it will be, before it is.  Even when I'm in my build as I go mode, I do a quick mock up just prior to execution.


Still looking forward to firing the fuel injector today.  I think I may make dual blog entries today.  Or just come back and edit this one...


Later that same day;

WOW!! Well.  I guess I shouldn't be surprised.  I mean, if you had a nice spray pattern you might screw up and make some good mileage.  Be closer to fumes.  Of course we couldn't have that from the factory.

Here's my video of firing one of my injectors off of the garden hose so I can see the pattern and better know how to aim it in the vaporizer box.


Last pic of the day.  I did a few more holes in the body to allow screws to hold my tail lights on.  On one side.  They're lining up good enough for who it is for, but the screws themselves aren't the right ones so I'll be away tomorrow to look into sourcing those.


Saturday, March 5, 2016

Mar 05 - Too many diff directions

You know when you start to do one thing but about 4 diversions later you realize you're nowhere near where you were when you set out to get a particular thing done?  Yeah, that was my day, today.
So I set off to make a fuel injector tester and to test a FI that I have from my original set that came stock on my 95TA LT-1.  So I made a 555 circuit as a guy on YouTube had suggested.  Got that altogether pretty quick.  Found a power cord.  Dug up a battery and put it on the Battery Tender Jr.  Was moving along pretty good.  Then it came down to getting the injector to fit onto something that I could use with a garden hose.  After a lil fab work, I had a friction fit with an injector and a 5/8" garden hose mender.  It has a hose barb on both sides and once I got one end to be beveled slightly, I then cleaned up the top of the injector (without the o-ring on top) and was getting it together.


Then it hit me, maybe the battery isn't done on the charger?  On the way to the charger, I spotted something that I thought I could get done right quick.  Then this lead to another thing... I needed to see how the exhaust stuff was going to line up and measure how much pipe I would need to come up with for my monza tips to show up at the right spot on the back of the car.  So I had to get help putting the rear bumper on.

Then I had to have my son shoot a couple of pics for me, so I could see the appearance of the tips in about the right spot.  So I had him shoot pictures of me holding them up one at a time with different depths under the car so I could see where they would be under the car to make sure that would work out for me.


I think the second one works out best.  I think that is more of a stock location too.  It'll be very tight getting the driver side one into that position for the pipe that leads up to that tip.  But I think I can heat and bend some pipe into that spot.

Then of course, while I was checking out stuff on the tail, I had to look at some of the other pieces I had been wondering about for ages.  I went and grabbed the center tail and light bezels to check them out.  Then I seen how the tail lights themselves should mount so I grabbed one set of them.  Next thing you know, I'm drilling holes and mounting tail lights.  I didn't drill the holes for the screws that will hold them on, but I did hold it up to have a look.


So who knows what the future holds?  Maybe tomorrow I'll go ahead and fire that fuel injector.  I did make everything to be able to fire it already.  :-D

Thanks for your time.
Coop

Friday, March 4, 2016

Mar 04 - awww nuts

So I was able to score some nuts for my stock exhaust today. That plus a pipe pull from Hawks and I was in business. I broke out the Dewalt reciprocating saw and went to town. Cut and welded for one side and only had to cut so far for the other.

I also cleaned up my plug wires a bit with some wire keepers.

Some progress beats none.

Get more in the coming days.